
Here at E3D we're continuously trying to develop new and better technology for 3D printers. With the Volcano we solved the problem of printing big, strong, and fast, but how about printing really small and fine details? The 0.25mm nozzle has been available for several years now, but really it isn’t all that much smaller than a “standard” 0.4mm nozzle. So how small could we go?
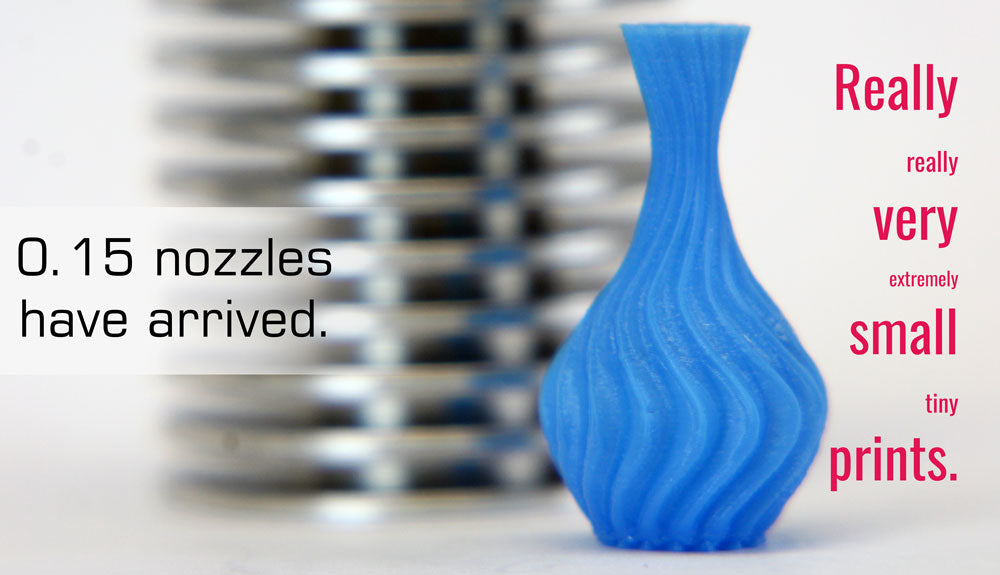
How about 0.15mm?

These nozzles can print some seriously small details. Before now we didn't have the confidence to try and manufacture these for a wider audience, and had doubts about the reliability of machining as well as use.
This is some exceptionally fine tooling after all - even the slightest variation in concentricity or alignment can cause blockage and other problems down the line. However over the last few months we took the plunge, and after a number of iterations and extended stress testing the results have made us sure that it was worth every effort.
The prints produced at this scale allow you to resolve a level of detail which rivals even SLS methods, and when you take into account the cost saving you quickly realise how awesome this nozzle is. This is a level of reliability and quality you simply won't see in most other tiny nozzles, with painstaking attention paid to details like tip-flat size and orifice length.
With such a tiny orifice, you would no doubt expect a proportional increase in detail and quality across the part (which is exactly what you get!), but what really took us by surprise was the massive decrease in the number of unwanted print artifacts like oozing and angel-hair strands. Once we dialed in our slicer settings these problems disappeared almost entirely. More research is needed, but our hypothesis at this time is that the small nozzle significantly reduces the propensity of the flow without extrusion force.
Whilst the tiny nozzle produces incredible results, it does have some very specific printing requirements that need to be met in order to print successfully. These nozzles are not easy to print with! We have broken down the challenges we faced into a few areas and have outlined our experience below, but the majority of the issues come from printing such small parts at such slow speeds.
Hardware
Material
The good news first; printing small parts also has the benefit of using very little plastic. You can use all those scraps from not-totally-finished spools (as long as they're clean!) and have close to no waste!

The bad news is that the materials that we were able to achieve successful prints from was fairly restricted. Best results were obtained with MG94 ABS, PC-ABS, and PMMA. All of these materials have a very high melt-flow rate and so can easily be extruded through the tiny orifice. Other materials like PLA, PETG and even spoolWorks Edge aren't really reliable at this scale of printing.
Even the tiniest amount of debris in the filament can cause physical blockages in the nozzle which were almost impossible to clear. We recommend using only clean, high-quality filament, and even keeping a couple of spare nozzles in stock if you're planning on doing a lot of tiny printing. A simple filament cleaning device, made up of a bulldog clip and a piece of paper towel, can also remove most of the dust from your filament.
XY(Z) Resolution
We have managed to reach the limits of the motion system’s resolution with every printer that we have mounted these nozzles onto (including Nophead Mendel90s and the BigBox). Microstepping becomes very noticeable at this scale - no standard FFF style 3D printer was designed with this level of detail in mind!
Don’t be put off by this though. Any high-quality 3D printer should be able to produce stunning results with this nozzle. Just be prepared to notice imperfections in your machine that you may not have even been able to see before.
Socks
Using a silicone sock on your heater block is essential when printing with these nozzles. We tried several times to print without one, never successfully. This is due to the large surface area on the bottom of the block radiating heat onto the print. This is of course an effect seen with all sizes of nozzle, but is much more of an issue with these smaller nozzles for two reasons.
Firstly because they are (generally) used to print smaller parts, and secondly because they print more slowly. These two factors mean that the print will spend a lot more time directly below the hot block. Additionally, the tiny details are much more prone to warping as their thermal mass is so low.
Part Cooling Fan
Keeping the print cool is much more critical but also more difficult when printing small. So in addition to a silicone sock we also recommend using a part cooling fan. In this case the bigger, the better. Because your print-speed is so low, adding mass to your carriage should not affect performance. On the other hand this does make the use of a sock even more important as it will protect the HotEnd from overcooling (which could cause poor printing performance and thermal runaway errors).
Try to cool the part as homogenously as possible using an annular duct. This will ensure that fine features are preserved on all sides of the print. Aggressive cooling also improved the bridging capability of these nozzles.
You won't be alone in being blown away - the small parts you print might be too! Some fans we've used have actually sent parts flying off the bed. In our experience this was mainly due to the small contact area of some of the (comparatively) tall, thin prints we were testing. As the height of the print increases, the effects of the heated bed reduce. Therefore fan power can be progressively lowered during the printing process.

Bed
Using UHU stick is recommended for best adhesion (as is our standard recommendation for printing with ABS filament).
With a first layer less than 0.1mm tall, having a level and well-calibrated build platform is extremely important. One saving grace here is that because parts tend to be small, the area over which this level of accuracy needs to be maintained is relatively small.
If using a part cooling fan, you may also find that it cools the bed as well as the print. Increasing the temperature of the print surface will compensate for this issue.
If you are having difficulty on the levelling front, here are a couple of hacks we used (but if anyone asks, you didn’t hear this from us!):
- A thick layer of gluestick provides some compensation for errors in bed levelling. In some cases tracks on our first layers were actually below the level of the glue. This also makes the part easier to remove once the print is finished. In some cases we actually achieved better results when starting the print before the glue had fully dried.
- If you are having trouble with Z-Height, then bypass your Z-Endstop. Instead move the Z-axis manually until it is exactly on the bed (+-0.03mm or better) then use G92 Z0 and remove Z-homing from your GCode. Only do this if you are happy that you understand what you are doing and are certain that you won’t crash your printer and cause damage.
Extruder
The flowrate through this nozzle is, as you imagine, incredibly low. Accordingly, so is the speed of the filament. However high force is required to extrude through this small nozzle, meaning that a geared extruder is essential. Titan performed admirably on our BigBox tests (3:1). On the Mendel 90, we used the stock Greg-Wade’s extruder which has a slightly higher ratio (3.5:1). Both performed well. The movement of the extruder at this speed is barely noticeable. We even tested this tiny nozzle with a Bowden system and it was a success!

Slicer Settings
Nozzle Size
0.15mm (obviously!)
Layer Height
We recommend somewhere in the region of 0.08mm. This proved to be the sweet-spot for us.
Print Speeds
Make sure to turn your speeds and accelerations down. This is all about precision, and precision takes time. We ran our printers at 18mm.s-1, with outline and infill under-speeds at 75-80%. The overhangs were left at the default 45°, and the minimum infill length at 5 mm.
Retraction
Stringing can be almost entirely tuned away in your retraction settings, however poor tuning can make things much worse due to the higher extrusion forces and pressures. We were using 1mm at 30mm.s-1.
For a full breakdown of the slicer settings please see the documentation on our Dozuki
Ecosystem
The 0.15s drop right into the E3D Ecosystem and can be used on a standard V6, although for best results we recommend a 1.75mm direct.