

At E3D we make high-performance extrusion system hardware for FDM 3D printers, including nozzles, HotEnds, and extruders.
As you can imagine, designing, manufacturing, and testing this kind of hardware usually involves a lot of 3D printing!
All the 3D printer tinkering we’ve done over the last decade has taught us a few things about how to get a 3D printer performing. So, here’s our round-up some of some top 3D printing troubleshooting tips. We hope you find it useful!
1. Clean and level your bed
3D printing support forums and message boards all over the internet are often littered with the phrase “level your bed” to the point it’s become a meme.

First layer not sticking? No extrusion on regions of your print bed? Cleaning and levelling your bed are the first troubleshooting steps to try when things aren’t working as expected.
Cleaning your bed
Over time, your 3D printer’s bed will accumulate dirt and grime from handling, from material residue, and from things you’ve put on the bed to help with adhesion, like glue, hairspray, blue painter’s tape, Kapton tape, chewing gum, or whatever.
- If you’re using a glass build plate, some regular dish soap and water is a good way to clean it (make sure it’s dry before you use it again!)
- For non-glass beds, isopropyl alcohol (IPA) is a useful thing to have on hand. It can be used with some tissue paper or an old rag to remove grease and grime, allowing material to adhere to it better.
IPA is also useful to have on hand for other geeky hobbies besides 3D printing, like airbrushing, or electronics. Handle with care, though: IPA is a flammable solvent that gives off nasty fumes that will make you higher than Snoop Dogg. Always be responsible – a well-ventilated area far away from open flames is key when working with any solvents.

“3D print erry-day” Model: Selfix
Levelling your bed
A great 3D print starts with a great first layer. It’s essential the nozzle is a close, constant distance over the whole area of the build plate for this. If the gap between the nozzle and bed is too large, material won’t adhere well, the print will fail, and the time and material invested in your 3D print will have all been for nothing (unless you want to post pics of it on our #3d-print-fails channel on Discord).
Levelling the bed will vary depending on the 3D printer you use, but generally it takes around ten minutes and it’s a simple process involving a regular piece of paper, and some knobs! Our partners at MatterHackers have created this handy guide to walk you through it:
Helping with bed adhesion
If you’re still getting adhesion issues after cleaning and levelling your bed, DimaFix is a great addition to your 3D printing toolkit. We use DimaFix at E3D all the time. It’s a special adhesive designed to increase adhesion as the bed heats up and decrease adhesion as the bed cools. This makes it easy to pop your print off the bed at the end of a job.

- DimaFix can completely replace common adhesion methods like 3D printed brims and rafts. The result is a cleaner-looking print with fewer post-processing steps – like cutting off brims and rafts, or sanding off stringy bits from the base of your print.
- DimaFix is also great for useful-but-annoying-to-print materials like ABS – this tends to warp and break free after a few layers. DimaFix will keep it in check, saving you wasted time and material from frustrating print failures.
- DimaFix is completely water soluble, so it’s easy to clean off the bed when finished using regular dish detergent and some water. You can clean it off the base of your print in this way, too.
Guess what? You can buy DimaFix from us!
2. Update your firmware and slicer
Any fancy piece of hardware needs software to drive it, and 3D printers are no exception.
3D printing is cool, because once you have the materials and hardware, you can get everything else you need without paying a penny! This is because a lot of useful 3D printing software is released under open source licenses.
Slicer 101
What does a slicer do? It’s a software application that ‘slices’ your 3D model into horizontal layers so it can be 3D printed. It takes a 3D file as an input (such as an STL, OBJ, or 3MF), slices it up, and outputs the result as GCODE for your 3D printer.
What’s GCODE? This is a machine language your 3D printer’s firmware interprets to control the axes, heater, and other parts during a print job. GCODE isn’t just used for 3D printing; it’s used in lots of different types of CAM equipment too, like CNC machines, laser cutters, and the super-advanced lathes we machine Revo parts on.
What’s the best slicer?
People often ask: ‘what’s the best slicer?’ The answer: the one that works best for you!
Some popular slicers are Cura and PrusaSlicer, but there are more if you’re feeling adventurous. These are particularly attractive options as they are free to use, and they’re well-maintained with regular updates, improvements, and new slicing features that add more capabilities to your 3D printing hardware.
Slicers have hundreds of settings to configure, giving you a great depth of control. To avoid intimidating the noobs, the most important settings are wrapped into pre-configured profiles. This means you don’t have to tweak a lot of individual settings every time to get good results. If you’re a 3D printing beginner, it’s wise to trust the profiles. As you gain experience, you can tweak more individual settings.

An STL loaded into PrusaSlicer ready for slicing
If you need to dive into individual settings to get your 3D printer performing, here are some top slicer settings to tweak:
Printing temperature. This is how hot your HotEnd will get during a print job. If you’re dealing with extruder grinding or under extrusion (i.e. where not enough material is coming through the nozzle and there are gaps in your print), increasing temperature by 10-20°C can make all the difference to get material flowing. Don’t increase it too much though, otherwise your material will start to combust, which smells even worse than printing ABS!
Not all 3D printing materials are created equal, so there is some variance between ideal settings. Usually, the minimum and maximum printing temperature will be listed on the material’s data sheet, labelled on the spool, or stated on the vendor’s website.
Line width. This is the width of a single line that’s extruded from your nozzle. Sometimes it goes by different names, such as ‘extrusion width’ or ‘track width’, but the meaning is much the same.
Extrusion width should correspond to the nozzle fitted into your HotEnd (e.g. 0.4mm for a 0.4mm nozzle, 0.8mm for a 0.8mm nozzle, and so on). Sometimes the value is slightly reduced to fine-tune material flow. If you’re running into extrusion issues, check your slicer’s width value is close to the nozzle size you’re using.
Retraction distance and speed. As filament is pushed through your HotEnd, molten material will be under increasing internal pressure. If your 3D printer is making a travel move, it won’t need to extrude material. But if there’s internal pressure in the HotEnd during this move, filament is going to ooze out as it moves, and even stick to your half-finished 3D print in places you don’t want it to.
So, retracting the filament slightly will reduce this pressure and help prevent print defects. Fine-tuned retraction settings can be the difference between a fugly, stringy, blobby 3D print, and a beautiful, crisp, well-defined 3D print that will go viral on TikTok.
Ideal retraction distance can vary depending on your 3D printer’s extrusion system setup. If you’re using a Bowden setup, the extruder is further away from the HotEnd. This means more force is needed to retract filament, so the retraction distance tends to be higher.
If you’re using a direct drive setup, the extruder is close to the HotEnd and has better extrusion control, so the retraction distance will be lower.
Sometimes tweaking the retraction speed can also help prevent print failures. If a retract move is too fast, it can grind away the filament, causing your print to fail. Reducing retraction speed will retract material more gently, without grinding it away in the process. Good retraction settings are useful for complex models with lots of gaps, like this Voronoi Valentine’s heart.
Firmware 101
3D printer firmware is embedded software that runs on your 3D printer mainboard. Its main job is to interpret GCODE commands, like the ones created by your slicer. It can also do other things, like protect you from thermal runaways using some clever built-in algorithms.
RepRap, Klipper, Repetier, Sprinter, and Marlin are common 3D printer firmware distributions. The most widely-used firmware is Marlin – if you’re using a Prusa, Creality, or even an Ultimaker, you’re probably running a flavour of it.

Marlin 2.0 source code loaded into Microsoft Visual Studio Code
Configuring firmware
You can tweak and configure the source code of Marlin to control your machine’s behaviour.
Here are some hand-picked Marlin configuration videos we like from the community:
Chris’s Basement: Edit Marlin firmware
Teaching Tech: Beginner guide to editing Marlin firmware
Vector 3D: Marlin 2.0.x Full Guide
Quick firmware tweaks
When you want to make a small change, compiling a whole new firmware build is inconvenient, so Marlin has a way to change certain settings on the fly (sometimes this needs to be enabled manually first).
When enabled, you can issue GCODE commands to your 3D printer via USB in a terminal program, such as Printrun.
To get good quality extrusion, the most important setting to tweak is:
E steps/mm. Your motion system and extruder have a steps/mm value in firmware that will correspond to how many steps each motor moves to make axes or filament travel 1mm. This usually differs between machines, so it’s necessary to configure it to get good quality prints.
If this value isn’t set up properly for your extruder, it will drive filament too fast or too slow, causing ugly prints.
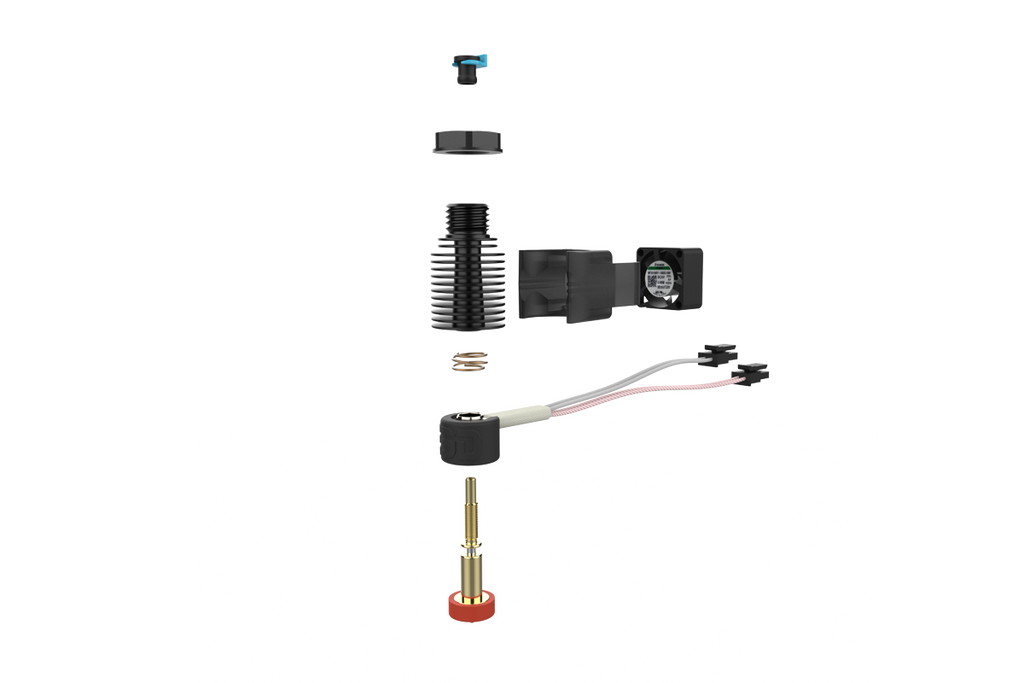
If you upgrade your extrusion system to Hemera, this step is essential. This is because the drive gears are different than most stock extrusion systems.
When everything is working as expected, this value can be written to your 3D printer’s memory with an M500 command. This means the setting will persist, even after the 3D printer has been powered off.
You can edit other settings on the fly using similar methods. There are wealth of free resources to guide you through the process, like the E3D Help Centre. Marlin’s documentation is also comprehensive.
Here’s a good introduction to installing Hemera on a Creality CR-10 V2 (or V3!)
3. Check or replace your fans
Fans are an essential part of a HotEnd, especially the one on the cold side - without this, you won’t have any extrusion at all! The cold side fan keeps part of the HotEnd cold so high-pressure molten material will flow out of the heated nozzle, instead of backflowing up the way it came. So, it’s important fans are functional to get good 3D printing results.
Cold side fans
The cold side of a HotEnd mounts to your print head and is usually fitted with a heatsink and fan. The fan on the cold side will stay on as long as the printer is powered to draw heat away from the HotEnd and prevent heat creep.
If you’re replacing your cold side fan, make sure its static pressure is greater or equal to the stock one – a lower static pressure than required can cause print defects. This is particularly important if you’re using Hemera. You can find fan static pressure by checking the fan’s data sheet.
Part cooling fans
It’s not essential to have a part cooling fan on your 3D printer, but having one or more can really improve print quality. A part cooling fan also enables you to print slightly faster, as the air blowing will cool your printed parts quicker.
Part cooling fans are slightly different from a cold side fan because they generally activate after the first few layers of a print and have variable speed control via a PWM pin on your mainboard.

Hemera has a specially designed dual-action heatsink. It keeps the cold side cold, and directs air from the part cooling fan up and away from the 3D print to prevent warping
4. Maintain your motion system
The X, Y, and Z axes of your 3D printer move your HotEnd around so it can 3D print things. We refer to these axes collectively as ‘the motion system’.
The motion system is typically made up of a combination of smooth rods, threaded lead screws, belts, bearings, and pulleys. The mechanical parts of the motion system move constantly for hours at a time, so they need to be maintained to reduce wear over time. Fortunately, it’s quite easy to do.
Lubricate the axles
Every month or so, lubricate the smooth rods with a PTFE lubricant, and make sure the bearings are well lubed too.
The Z axis will have either one or two spiral lead screws. Grease these up every so often too, so the motion system can move in all directions smoothly.
Adjust the belt tension
If you’re 3D printing assemblies of parts and you find they’re not fitting together well, belt tension could be something to examine. Doing this keeps your 3D printer running smoothly and keeps your 3D printed parts dimensionally accurate.
5. Replace Bowden tubes
Not every 3D printer uses a Bowden setup, but many do. If you’re using a Bowden setup, you want your Bowden tubes to be slippy on the inside – this allows filament to travel through them with little resistance. If there’s too much friction in your Bowden tubes, you’ll see artifacts in your 3D print from underextrusion.
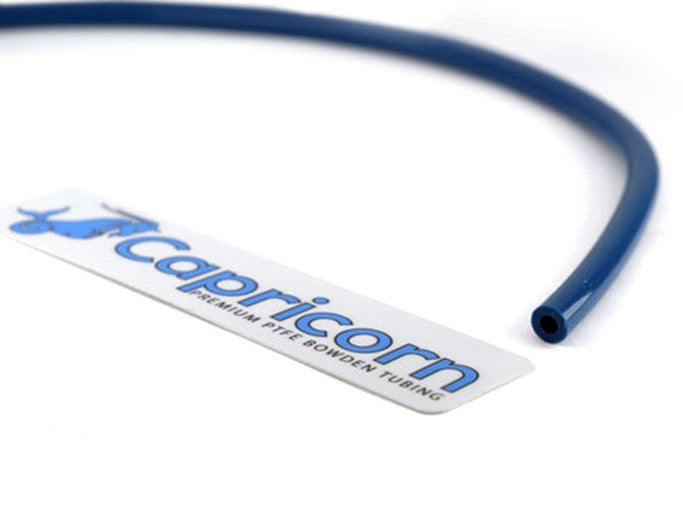
Capricorn Bowden tubes are made from XS PTFE (Teflon) so they’re nice and slippy. We sell them in 1M lengths, which is plenty for most printers.
Buy premium Capricorn Bowden tubes from us!
6. Store materials properly
3D printing materials have a shelf life. If they’re stored out in the air too long, they’ll go bad, and print even worse!
If your 3D printer’s nozzle makes a lot of popping noises, that means your material is bad and probably won’t be salvageable, unless you have a spare vacuum oven somewhere.
The popping sound is the moisture inside the material superheating as it passes through the hot nozzle and being released as steam! This will give you lots of tiny holes in the extruded material that will look RUBBISH.
Common materials like PLA are quite forgiving, but if you’re getting bad results with it and you’re sure your printer is calibrated well, it’s always wise to test a different material to see where the fault is.
Materials like ABS are difficult to print, but have great dimensional accuracy and stiffness, so are good for certain applications, like building a Voron 3D printer. Besides a bad smell when printing, another drawback of ABS is it is hygroscopic, which means it absorbs ambient moisture easily.
7. Fit Revo to your 3D printer!
I guess we’re a little biased, we really think you’re going to like our latest HotEnd ecosystem. It fits onto many hobby-level 3D printers, including Prusa and Creality, and it makes nozzle changes a million times easier than nozzle changes with tools and hot tightening. Read all about it.
Revo Micro from E3D
Give us your tips!
If you think we’ve missed something, you can tell us in real time on the E3D Discord, which is full of helpful 3D printing experts you can learn from (including us!) It’s also a great place to get extra help when you’re stuck.
There are a lot of variables to account for with all the different 3D printers on the market, so maybe you’ll find you have different tips than us. What are your top 3D printer maintenance tips?
You can find support for E3D products on the E3D help centre. Or, if you’re really stuck, contact our dedicated customer service team who can help you with any other issues.